Mastering Homemade Peanut Butter Ice Cream: A Journey to Rich & Creamy Custard Bliss
There's a special kind of magic in homemade ice cream, a depth of flavor and velvety texture that store-bought varieties simply can't replicate. And when that magic is infused with the irresistible taste of peanut butter, you’ve truly hit the jackpot. Forget simple scoops; we're talking about a transcendent culinary experience: a deeply nutty, incredibly rich, and impossibly creamy homemade
peanut butter ice cream built upon a classic custard base. This isn't just dessert; it's a testament to the fact that some of life's greatest pleasures are crafted right in your own kitchen.
Why a Custard Base Makes the Best Peanut Butter Ice Cream
While there are many excellent ways to make
creamy peanut butter ice cream, machine or no-churn options, for true connoisseurs of texture and flavor, the custard base reigns supreme. What exactly makes a custard base so exceptional for
peanut butter ice cream? It's all about the eggs. When egg yolks are gently cooked into a mixture of milk, cream, and sugar, they emulsify the fat, preventing ice crystals from forming and creating an incomparably smooth, dense, and luxurious mouthfeel. This rich foundation allows the robust flavor of peanut butter to truly shine, adding a layer of sophistication that simpler recipes often miss.
The process of making a custard base, while perhaps sounding a touch intimidating, is surprisingly straightforward and incredibly rewarding. It ensures a final product that is not only rich in flavor but also boasts an unparalleled creaminess that clings to your spoon and melts slowly on your tongue, delivering that satisfying peanut butter hit with every bite.
Crafting Your Rich & Creamy Peanut Butter Custard
The secret to an extraordinary
peanut butter ice cream begins with understanding and respecting each ingredient. Quality matters, as does technique.
Key Ingredients for Unrivaled Flavor:
*
Peanut Butter: Opt for creamy, all-natural peanut butter with minimal added sugar and no hydrogenated oils. While popular commercial brands like Jif or Skippy can work, a natural peanut butter will deliver a more intense, authentic roasted peanut flavor, and its oil separation can actually contribute to the ice cream's smooth texture when properly incorporated. Avoid crunchy varieties for the base to maintain maximum creaminess, though you can add chopped roasted peanuts as a mix-in later.
*
Dairy: A combination of heavy cream and whole milk creates the perfect balance of richness and body. Full-fat dairy is non-negotiable here; reduced-fat or skim varieties will lead to an icy, less satisfying result. Keep your cream and milk as cold as possible before starting.
*
Sweetener: Brown sugar is often favored over white sugar in custard bases for
peanut butter ice cream. Its molasses content adds a subtle caramel note and depth that complements the nutty flavor beautifully.
*
Eggs: Fresh, large egg yolks are the emulsifiers that create the custard. They are the heart of your creamy texture.
*
Flavor Enhancers: A good quality vanilla extract (or even a vanilla bean, if you're feeling fancy) elevates the overall aroma. A pinch of sea salt is crucial – it doesn't make the ice cream salty, but rather brightens the sweetness and intensifies the peanut butter flavor, providing a well-rounded taste profile.
The Custard-Making Process: A Step-by-Step Overview
1.
Simmer the Dairy & Sugar: Gently heat the milk, cream, and brown sugar in a saucepan over medium-low heat, stirring until the sugar granules are completely dissolved. Do not boil.
2.
Temper the Eggs: In a separate bowl, lightly whisk your egg yolks. This is where the magic (and a common pitfall) lies. Slowly ladle about a cup of the warm milk mixture into the whisked egg yolks, whisking constantly. This gradual addition raises the temperature of the eggs gently, preventing them from scrambling.
3.
Return to Heat & Thicken: Pour the tempered egg mixture back into the saucepan with the remaining warm dairy. Continue to cook over medium-low heat, stirring constantly with a wooden spoon or heat-proof spatula. The custard is ready when it thickens enough to coat the back of the spoon, and when you draw a line with your finger across the coated spoon, the line holds. A thermometer is your friend here; aim for 170-175°F (77-79°C). Do not let it boil, as this will curdle the eggs.
4.
Off the Heat & Flavor Infusion: Immediately remove the saucepan from the heat. Stir in the creamy peanut butter until it is thoroughly melted and smoothly incorporated into the warm custard. Add the vanilla extract and sea salt, stirring until combined.
5.
Chill Thoroughly: This step is non-negotiable for a truly sublime
peanut butter ice cream. Pour the custard mixture into a clean bowl, cover it tightly (a piece of plastic wrap directly on the surface can prevent a skin from forming), and refrigerate it overnight, or for at least 6-8 hours, until it is completely chilled. This chilling period allows the flavors to meld and mature, and ensures the mixture freezes efficiently, resulting in a smoother texture.
Churning, Freezing, and Savoring Your Masterpiece
Once your custard is perfectly chilled, you're ready for the final, exciting stages.
*
Churning: Transfer the chilled custard to your ice cream maker's pre-frozen bowl. Churn according to the manufacturer's instructions, typically for 20-30 minutes, until the mixture has the consistency of soft-serve ice cream. The churning process introduces air, creating that light yet creamy texture. For detailed guidance on both machine and no-churn methods, you might find our article on
Make Creamy Peanut Butter Ice Cream: Machine or No-Churn Options helpful.
*
Freezing for Firmness: Once churned, the
peanut butter ice cream will be soft. Transfer it to an airtight freezer-safe container. Press a piece of parchment paper or plastic wrap directly onto the surface of the ice cream to prevent ice crystal formation, then seal the container. Freeze for an additional 2-4 hours, or until it reaches your desired scoopable consistency.
*
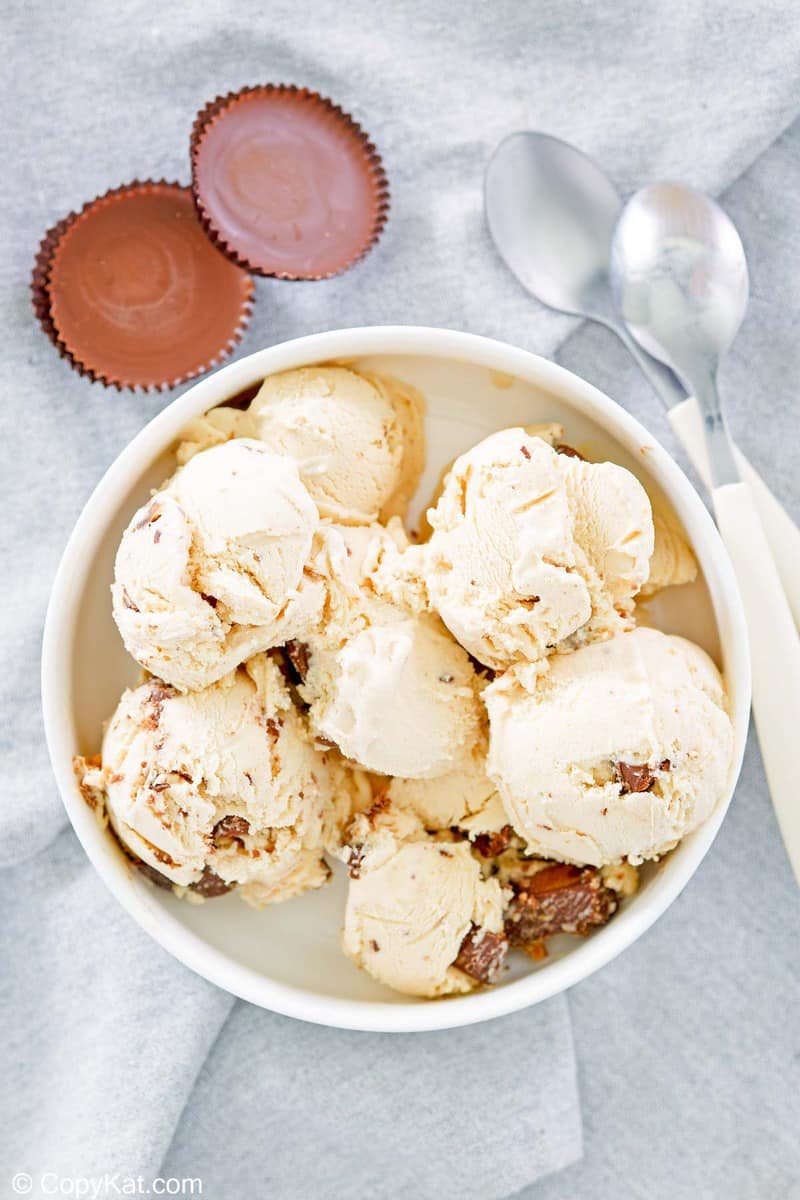
Serving Suggestions: The beauty of this rich and creamy
peanut butter ice cream is its versatility. Enjoy it unadorned to truly appreciate its pure flavor. Or, elevate it with your favorite toppings: a drizzle of melted chocolate or hot fudge, a dollop of jelly (for that classic PB&J twist!), chopped roasted peanuts for added crunch, mini chocolate chips, or even sliced bananas. The possibilities are endless!
*
Storage: Homemade ice cream is best enjoyed within a week or two. Store it in an airtight container to prevent freezer burn and keep it tasting fresh.
Troubleshooting and Tips for Success
Even experienced ice cream makers can encounter a snag or two. Here are some tips to ensure your
peanut butter ice cream is a triumph:
*
Preventing Scrambled Eggs: The most crucial step is tempering. Always add hot liquid to cold eggs *slowly* while whisking, then return to the pot *slowly* over low heat, stirring constantly. A rubber spatula is great for scraping the bottom to prevent sticking and overcooking.
*
Grainy Texture: This usually means the sugar didn't fully dissolve or the custard was overcooked. Ensure sugar dissolves completely in the warm milk and use a thermometer for precise custard cooking.
*
Icy Ice Cream: Too much water content, not enough fat, or insufficient churning can lead to iciness. Stick to full-fat dairy, and ensure your ice cream maker bowl is thoroughly frozen and the mixture is churned until properly aerated.
*
Pre-Chill Everything: Beyond chilling the custard, consider pre-chilling your storage container. A cold container helps the ice cream freeze more evenly and quickly once churned.
While this article focuses on the rich custard method, for those seeking a quicker path to peanut butter bliss, exploring an
easy no-churn peanut butter ice cream: 3-ingredient recipe can also be incredibly rewarding. However, for the ultimate in luxurious texture and deep flavor, the custard base remains king.
Conclusion
Making homemade
peanut butter ice cream with a custard base is a culinary journey that promises incredible rewards. From the initial whisking of the eggs to the final, triumphant scoop, you'll be creating a dessert that is truly a cut above. The richness, the unparalleled creaminess, and the intense, authentic peanut butter flavor will redefine your expectations for this beloved treat. So, gather your ingredients, follow these steps, and prepare to master a dessert that will delight your senses and leave everyone asking for more. Enjoy the process, and savor every indulgent spoonful of your homemade masterpiece!